

|
|
This project was inspired by a
few things, not the least of which being a radio control tank from
Radio
shack I had when I was a kid. What started the whole thing, was seeing
a
few members from the Bay Area Tankers on The
Screensavers a while back.
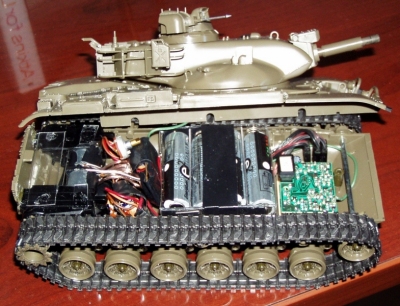
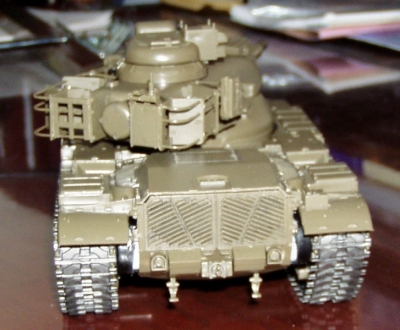
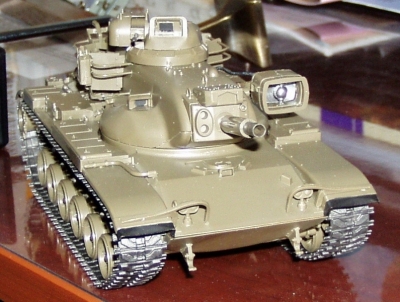
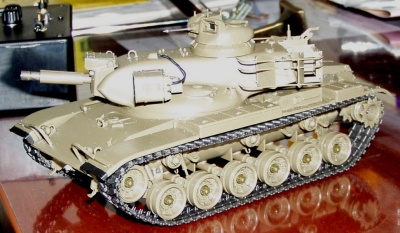
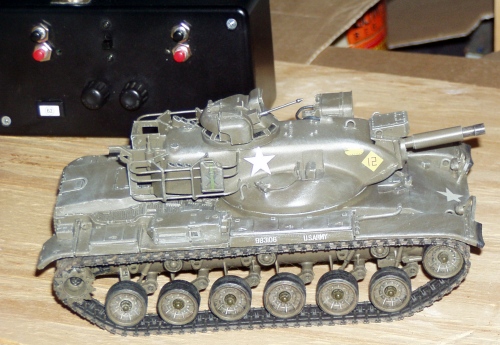
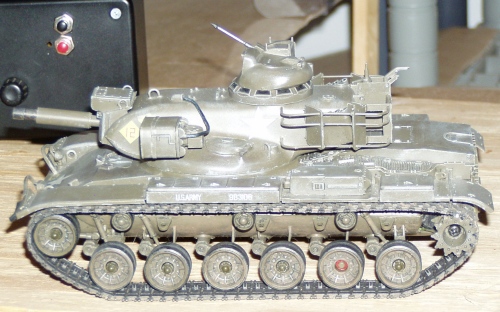
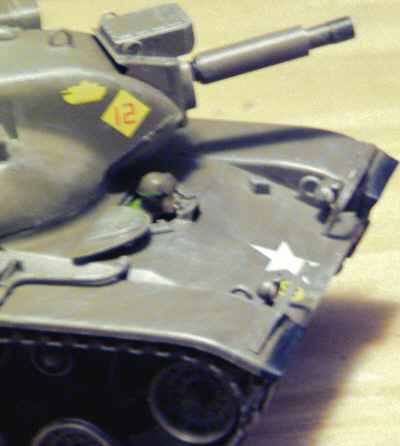
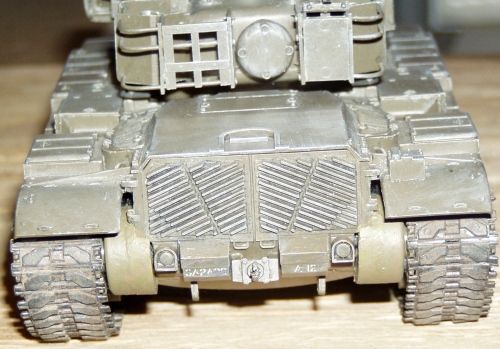
I've converted a Tamiya 1/35 scale M60A2 tank into an RC model. I've already modified two servos for continueous rotation, and transfered the contents of one of my pistol grip radios into a radio shack project box. The transmitter was gutted to set it up for independant control of each track. It's a funky setup, but it works well. This isn't really the proper way to drive a tank, contrary to popular belief. I really would have rather just electronically mixed the servos, and kept my pistol grip controller. There is no room for any type of mixer/speed controller, since the hull of the tank is 8" long, and about 4" wide across the fenders. Factor in the reciever, the hacked up servos, and their circuit boards, four AA batteries, and the power switch, and there isn't much empty space left. None that's useable, anyway. Got the kit on Friday (Feb 7th), and I've been working on it ever since. I have learned one very important lesson: Never ever try to shoe-horn two standard size servos into a 1/35scale model tank. Ther is no way of making them fit properly. I've taken most of casings off of them, and ground down one side of each, to get the drive sprockets down closer to their proper height. They're farther foward than they're supposed to be, but that's partly to take some of the tension off the tracks. The drive sprockets also sit a little bit too far outboard, but not enough to cause any problems. The turret has a weird shape to it. It's got this long narrow design, that was originaly intended to be a low observable shape (yeah, stealth tank from the 60's). The low observable properties are pretty much ruined by the big ass flood light on the side, and the huge comander's cupola up top. It's either hideously ugly, or really cool looking, depending on your tastes. Me, I rather like it. I am far from finished with this model, though I have done some more to it since these photos were taken. It still needs more detail painting, and decals applied. I'm waiting to get some matte clearcote, to protect the paint, and decals. As of March 6th, the tank has had some more detail painting, and weathing. The tires (yes tanks have tires) on the road wheels have been painted, as have the windos in the commander's cupola, and the headlights.. I also put a lens on the searchlight. I've also got a proper battery box in it, and have moved the drive sprockets back a little further to put a little more tension on the tracks. This meant cutting up the back a little more, but ultra scale detail was never my primary objective. I've also finally finished the servo hack, by replacing the potentiometers with resistors. The local Wally World (a Super Wal-Mart, no less) doesn't carry matte clearcote in what passes as their model section. Instead, I'm using Duncan Super Matte spray sealer. This stuff is meant to seal the paint on ceramic minatures, but a quick test showed it will work admirably on plastic. It also has sweet, finish. Flat, but still very smooth. I've used both the super matte, and the regular matte on ceramic peices, before. It's hard to keep the matte from developing a glossy sheen. |
| I didn't
have to mangle the model to badly to make this thing. Most of the lost
details are hard to see ones back by the drive sprockets. There was
some
damage done to the rear of the kit, but I think I can fix it pretty
well. It still looks nice, sitting on the shelf above my monitor, and
can actually be run around on the floor. I could cruise it around my
desk, but at 8 inches long, it wouldn't have much room to maneuver. If I try to turn it too sharply on a surface where the tracks get a lot of traction, it'll throw one. I don't run into that too often, and real tanks can't generally pirourette, anyway. Those modified servos are geared down so far this thing has no trouble climbing, at all. |
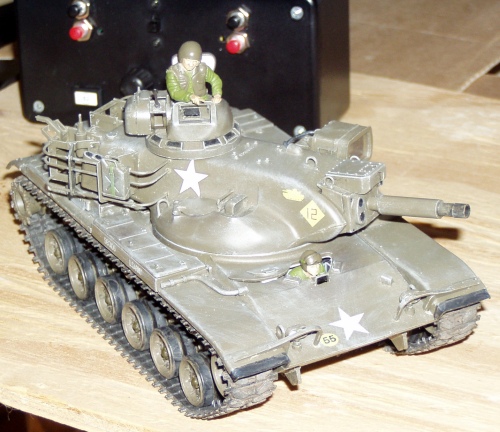
| After
ignoring this project for nearly two years, I've finally done some more
work on it. Paint, decals, and weathering have all been finished for a
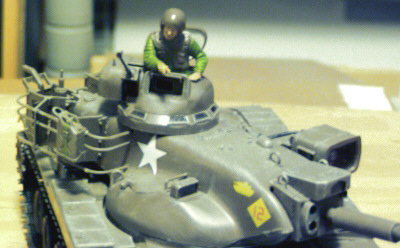
while, now. I can now put the driver, and commander figures in. They're
more for display purposes, but they don't interfere with operation. |
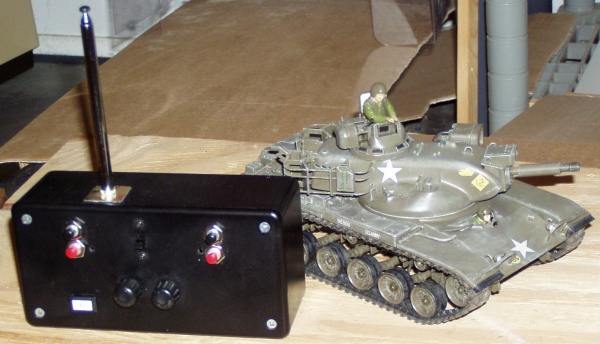
| The black
buttons move the tracks forward, and the red ones move them backwards.
She's pretty easy to drive, though I'd like a little softer springing
in the buttons. The dials are the original trim dials, and are still
needed, do to the imprecise nature of the AM radio system I'm using. The buttons aren't in the absolute best location, and once I figure out exactly where I want everything located, I'm going to drill the aluminum cover the project box came with use that instead of the plastic cover. I'll replace the current swith with a metal toggle switch as well, for asthetics. I'm thinking about painting the aluminum cover olive drab, before I install it. After getting the tank to where it is now, and driving it around for a few days, I discovered that I didn't need to gut a perfectly good pistol grip radio into a twin stick (and now a push button) configuration. All I really needed was an elevon mixer for RC airplanes, and it would drive like a real tank. These can be had for less than $20, and are small enough to fit in what little internal space is left in the tank's hull. It would mix my throttle and steering channels, so that I'd have seperate speed and steering control, instead of independant track control. That way, the tank would only pirouette when it wasn't moving forward or backwards, simulating the neutral steer of a real tank. Live and learn, I guess. If I do decide to use a mixer in the tank, I'll probably wait untill I can get a three channel pistol radio. I'll put a micro or micro mini servo in to rotate the turret. I doubt it'll happen for a long time. Three channel pistol radios are invariably either FM or PCM, both are expensive. No photos, but some time ago I adapted AFV Club's indivual link chevron pattern tracks for M60s, and M88s to work on this tank. I had to drill out the ends of the holes in the end links, and flair the plastic pins on the ends of the track links. The pins had to be flaired after the end links were in place. This was done with a push pin that had been heated up over a candle. I used two different puch pins, so I could alternate between them, as the plastic handles on them started to soften from the heat. The work was repetitive, and done while watching a Ghost Hunters marathon. The new tracks have much greater torsional rigidity over the old belt style tracks, and I can not get the tank to through them. The down side is a severe decrease in traction. Hard plastic just doesn't grip like soft vinyl does. Still, I'm very happy with the new tracks. |
| Little information on the real tanks: The M60A2 is kind of the bastard stepchild of the otherwise reliable M60 series. Mostly because of the main gun system. It picked up the nickname of Alvin with a lot of it's crews, but many simply called it "that piece of shit." That stubby little gun is a 152mm gun/missle launcher. Not only could it fire conventional rounds, it also fired the shileiliegh anti tank missle. During development they ran into problems with residue from the previously fired round, setting off the new one sometimes before the breach was closed. This could lead to every other round in the turret going off. This was finally fixed with a closed breach scavenging system. One problem never fixed, and the most likely reason no one liked the tank, is that firing conventional ammunition would totaly screw up the turret's electronics, making it impossible to fire a missle afterwards. That I'm aware of, no crew was ever able to fire a missle, after shooting a regular shell. The gap between the missile's minimum range, and the gun's maximum range didn't help matters any. Less than 600 M60A2s were made. Some were M60A1s with new A2 turrets. I've run into numbers ranging from 504, to just over 560. It was produced from 1971 to 1975 (it was developed in the mid '60s). No M60A2 is still in service, anywhere, with anyone (that I'm aware of). The M60, M60A1, and M60A3 are still in service with various militaries (as is the earlier M48). The A1, and A3 served in the Gulf War with the U.S. military, and fared quite well. The Isreali military uses M60A3s with great success against suposedly superior soviet built tanks on a regular basis. The A3 is basicaly an M60A1 with all the onboard electronics and gear that was used in the original M1 Abrams tanks. Most current A3 models are the A3+ which has been fitted with bolt on reactive armor packages. There are those who feel that the older M60A1 is superior to the M60A3, because it can fire faster under optimal conditions. I tend to wonder how often one finds optimal conditions on the battlefield. |